Parallel Wiki:Editing the wiki
This page is a short guide for new and prospective wiki editors on the Parallel Wiki.
Wiki basics
This wiki runs on MediaWiki software, so editors should reference the MediaWiki help. The following guide will cover some wiki editing basics, but not in as much detail as the documentation.
Creating an account
You need an account to edit the Parallel wiki. Click here to make one.
The wiki editor
You can use either the visual editor or the source editor to work on wiki pages (to test, click "edit" or "edit source" on the top right of an existing page). You can customize your preferred editing method in your preferences. Because the source editor allows for finer control, most of the following instructions pertain to the source editor.
The source editor lets you see the wikitext that makes a wiki page work. Wikitext has its own formatting rules (for example, you need two new lines in wikitext to make a paragraph break on the page). The visual editor displays the page as it will appear when it is published; source editor users will need to click "Show preview" at the bottom of the interface to see the results of their changes.
To save changes to a page, click the "Save page" button at the bottom of the editor (for source editor) or the "Save changes" button at the top right (for visual editor).
Making your own wiki page
Creating a page
Now that you have a wiki account, let's say you want to set up a wiki page for your town on Parallel. There are a number of ways to create new pages; for now, you can fill in the space below with your desired article title and click "Create page".
Formatting content
You can look at existing pages to get an idea as to how the content should be structured. For example, you can browse Category:Settlements to see what other users have done on articles for their own towns.
In the source editor, section headings are generated with equals signs surrounding text, like == Section heading ==. They are used to organize article contents and (if there are enough of them) to automatically generate a table of contents. Lower levels of headings have more equals signs. See the formatting help page for more details.
Links to other wiki pages can be added by enclosing text in brackets, as in [[Linked page]]. If you want the text to say one thing and the link to go somewhere else, use a pipe: [[Linked page|Displayed text]]
Uploading and using images
To add images to the wiki, go to Special:Upload or use the file upload button at the top of the editing interface. Please give the image a descriptive name! Using the image will be much easier for yourself and other editors if it isn't called something like "2021-12-28_16.39.02.png".
After you've uploaded a new image, it can be seen on the wiki; the page name will be File: followed by the destination filename you provided. To add the image to a page, use the syntax [[File:filename.extension|options|caption]].
Often you will want to display the image in a floating block with a description, like the Parallel logo on the right. The syntax for the image you see there is [[File:ParallelLogo.png|100px|thumb|right|The Parallel logo]]. See the image help page for more details.
Including templates
Templates are pages designed to be embedded inside other pages. To include a template in another page, use curly braces, like {{Templatename}}.
Some templates use parameters, which let you fill in values to change what the template displays. The parameters are specified with equals signs and separated with pipes. For example, Template:Slot can be used like {{Slot|Stone,16}} to render 16 stone in an inventory slot: ![]() 16
16
Templates should have documentation on their pages. Read the documentation if you're not sure how to use a template!
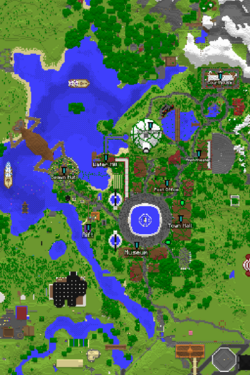
For a page about your player town, you would probably want to use Template:Infobox settlement. This is an infobox template, which will display on the right side of the page and give a brief summary of important details. It should be placed before any section headings on the page. For example:
| Type |
Town |
|---|---|
| Leadership |
Council of Elders |
| Headquarters |
Council Chamber |
| Ideology |
Moowist |
| Established |
2021 |
| Disbanded |
2029 |
| Public join? |
Yes |
| Status |
Active |
| Dimension |
Parallel Prime |
| Coordinates |
X = 12 |
| Underground? |
No |
{
    "extratext": "Map of the settlement",
    "title": "Editing the wiki",
    "images": [
        "Prime Spawn Map.png"
    ],
    "rows": [
        {
            "field": "Town",
            "label": "Type"
        },
        {
            "field": "Council of Elders",
            "label": "Leadership"
        },
        {
            "field": "Council Chamber",
            "label": "Headquarters"
        },
        {
            "field": "Moowist",
            "label": "Ideology"
        },
        {
            "field": "2021",
            "label": "Established"
        },
        {
            "field": "2029",
            "label": "Disbanded"
        },
        {
            "field": "Yes",
            "label": "Public join?"
        },
        {
            "field": "Active",
            "label": "Status"
        },
        {
            "field": "Parallel Prime",
            "label": "Dimension"
        },
        {
            "field": "X = 12<br>Y = 100<br>Z = 12,345",
            "label": "Coordinates"
        },
        {
            "field": "No",
            "label": "Underground?"
        }
    ],
    "invimages": []
}
{{Settlement
|name = Example Settlement
|image = Prime Spawn Map.png
|image_caption = Map of the settlement
|type = Town
|leadership = Council of Elders
|hq = Council Chamber
|ideology = Moowist
|established = 2021
|disbanded = 2029
|public = Yes
|status = Active
|dimension = Parallel Prime
|x = 12
|y = 100
|z = 12,345
|underground = No
}}
Which produces the output to the right:
Adding categories
Categories provide automatic indexes that are useful as tables of contents. Every page on the wiki should be at least one category. To add a category, go to the bottom of the editor and write out [[Category:Categoryname]]. For example, this page is in [[Category:Parallel Wiki]]. You would want to put your town in [[Category:Settlements]].
Congratulations!
You now have all the information you need to make your first wiki page. If you need help, feel free to ask questions on the Discord or on a wiki administrator's user talk page.

